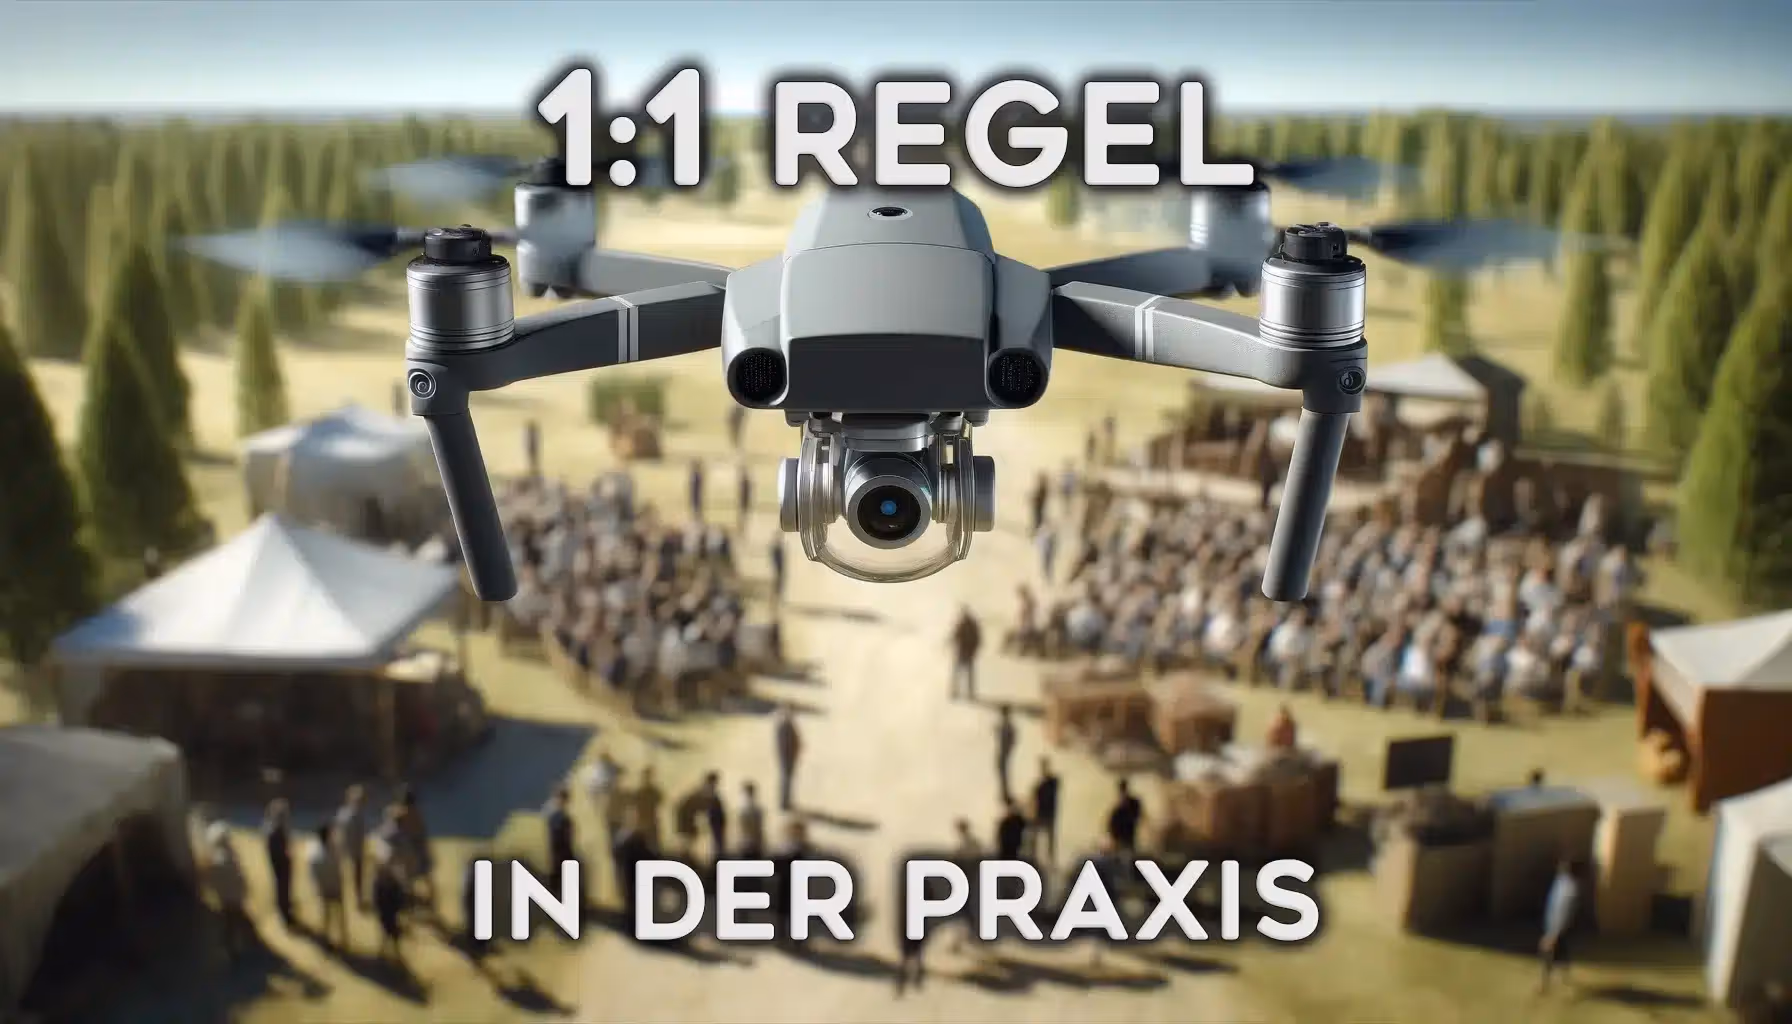
1:1 rule in practice

I'm sure you feel the same as many other drone pilots:

You know the 1:1 rule, but you don't know exactly how to implement it correctly in practice.

Because how are you supposed to constantly measure the distance from the drone to an uninvolved person or critical infrastructure if you don't have a very expensive drone with a laser rangefinder?

The good news is: it's pretty easy with almost any drone!

But one thing at a time. I would first like to explain to you exactly what the 1:1 rule means again:

Technical details

  • Aircraft:

    DJI Matrice 4T / 4E

  • Starting weight:

    1219 g

  • dimensions:

    Gefaltet: 260,6 × 113,7 × 138,4 mm (L × B × H) Ausgefaltet: 307,0 × 387,5 × 149,5 mm (L × B × H)

  • Maximum climb rate:

    10 m/s 6 m/s (mit Zubehör)

  • Maximum descent rate:

    8 m/s 6 m/s (mit Zubehör)

  • Maximum horizontal speed:

    21 m/s vorwärts fliegend 18 m/s rückwärts fliegend 19 m/s seitwärts fliegend

  • Aircraft:

    DJI Mavic 4 Pro

  • Starting weight:

    1490g

  • dimensions:

  • Maximum climb rate:

  • Maximum descent rate:

  • Maximum horizontal speed:

  • Aircraft:

    DJI Neo

  • Starting weight:

    135 g

  • dimensions:

    130×157×48.5 mm (L×W×H)

  • Maximum climb rate:

    0.5 m/s (Cine mode) 2 m/s (Normal mode) 3 m/s (Sport mode)

  • Maximum descent rate:

    0.5 m/s (Cine mode) 2 m/s (Normal mode) 2 m/s (Sport mode)

  • Maximum horizontal speed:

    6 m/s (Normal mode) 8 m/s (Sport mode) 16 m/s (Manual mode)

Die 1 : 1 Regel

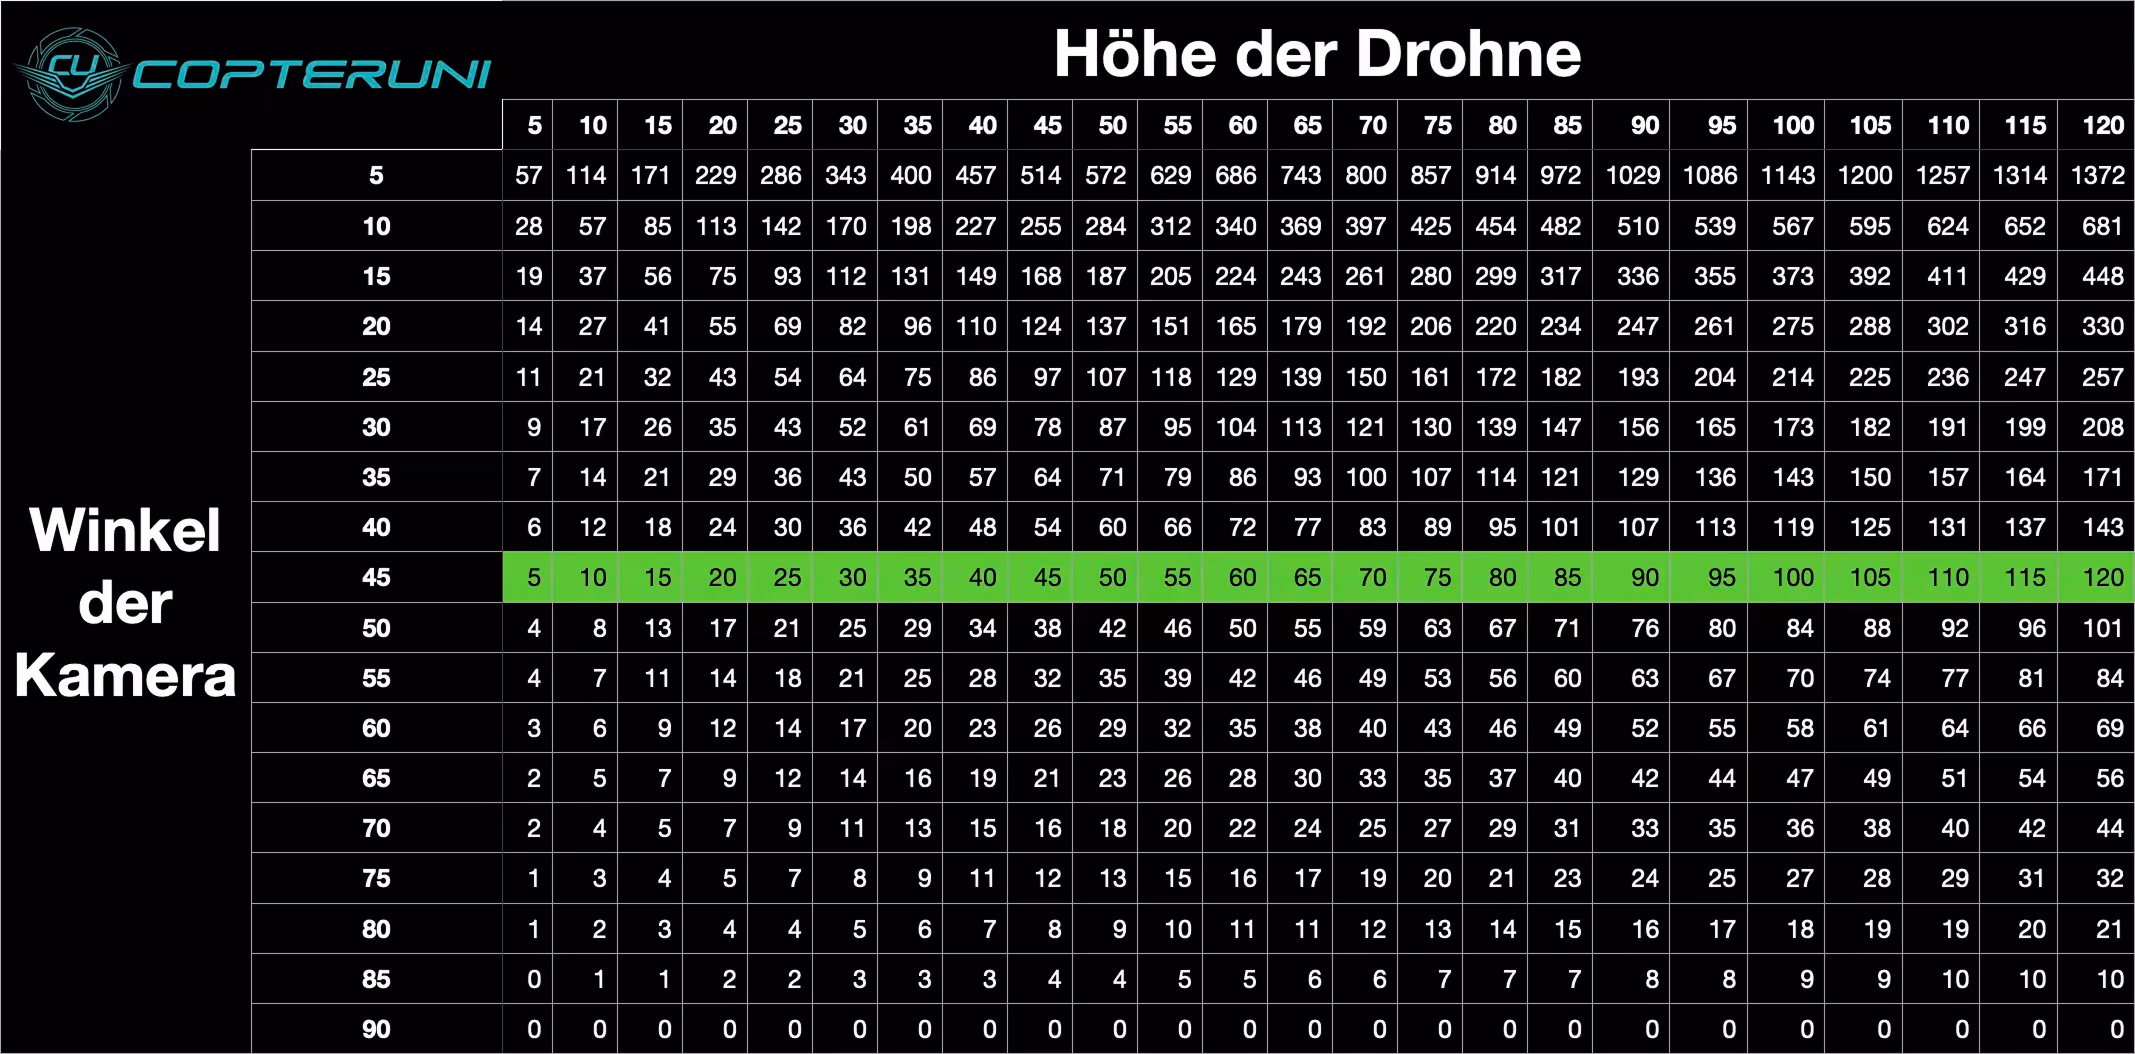
Nun, eigentlich ist es ganz einfach. Die 1:1 Regel besagt, dass die Flughöhe der Drohne nicht größer sein darf als der Abstand zu unbeteiligten Personen. Das heisst also, dass wenn Du 50m hoch fliegst auch einen Mindestabstand von 50m zu den unbeteiligten Personen einhalten musst. Fliegst Du nur 20m hoch, reicht ein Abstand von…. 20m, genau. 😉

Also, Du siehst das ist echt einfach.

Aber auch gleichermaßen wichtig, denn die 1:1 Regel dient dazu das so genannte Bodenrisiko, also das Risiko welches von deiner Drohne auf Objekte am Boden ausgeht, zu minimieren.

Wie funktioniert das?

Stelle Dir folgendes Szenario vor: Du fliegst mit deiner Drohne durch die Gegend und plötzlich fällt ein Motor aus. Bei den meisten Drohnen bedeutet das, dass die Drohne auf jeden Fall abstürzen wird.

Nun wird die Drohne aber nicht an Ort und Stelle senkrecht wie ein Stein zu Boden fallen, sondern dadurch, dass sie ja noch eine gewisse horizontale Geschwindigkeit besitzt, eine gewisse Strecke zurücklegen bis sie auf den Boden prallt. Diese Strecke ist hauptsächlich von der Höhe, der Masse der Drohne und natürlich von Ihrer Geschwindigkeit abhängig.

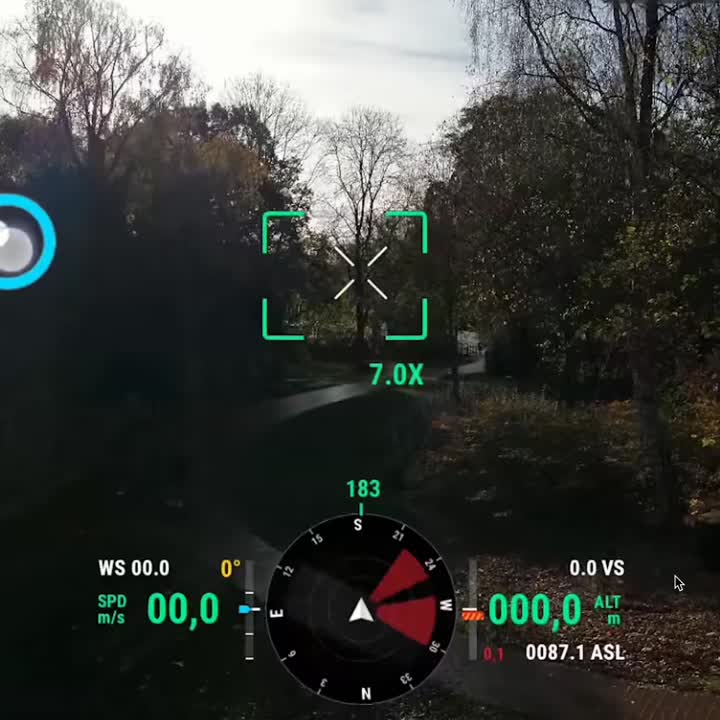
Hier mal ein Beispiel einer Drohne, welche in 50m Höhe mit einer Geschwindigkeit von 5 m/s fliegt und 900g (so wie die meisten Mavics) wiegt:

Simulation Flugbahn einer Drohne

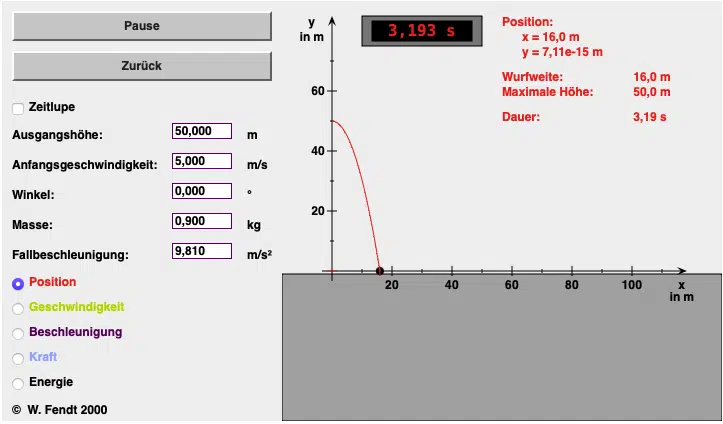
Simulation von Walter Fendt.

Du kannst hier sehen, dass die zurückgelegte Distanz nach dem Motorausfall noch 16m beträgt und es ca. 3s dauert bis die Drohne aufprallt.

Durch das Einhalten der 1:1 Regel haben wir hier also noch genügend Sicherheitspuffer übrig, um die unbeteiligten Personen nicht zu gefährden. Es sind genauer gesagt 50m - 16m = 34m.

Wiederholt man das Experiment mit der maximalen Geschwindigkeit von 21 m/s, so wird der Puffer deutlich kleiner, bzw. ist gar nicht mehr vorhanden. Die zurückgelegte Distanz nach Motorausfall beträgt dann 67m! 😳

Das ist zum Beispiel ein Grund dafür, warum man in der A2 Kategorie den Langsamflugmodus (max. 3 m/s) aktivieren muss, sobald man dichter als 30m an unbeteiligte Personen heranfliegt.

Gut, jetzt weisst Du schonmal was die 1:1 Regel ist, und warum man diese eingeführt hat.

Nun aber zurück zum eigentlichen Thema.

Wie kann ich die 1:1-Regel in der Praxis umsetzen?

Wir nutzen dazu ganz einfache trigonometrische Beziehungen. Einfacher gesagt: einfache Grundlagen von Dreiecken 😉 und ein Feature, welches die meisten Drohnen mit Kamera von Haus aus besitzen.

Und weil ich Dich jetzt nicht mit mathematischen Formeln belasten will, erkläre ich Dir direkt wie es in der Praxis funktioniert:

Wenn Du checken willst, ob Du die 1:1 Regel einhältst, kannst Du folgendes machen:

  • Richte deine Kamera so aus, dass Du die unbeteiligte Person oder andere kritische Infrastruktur im Bild hast.

  • Schwenke deine Kamera auf einen Winkel von 45° nach unten.

  • Prüfe ob sich die Person in der oberen oder unteren Hälfte des Bildschirms befindet

    • Obere Hälfte: ✅ alles Gut, Du hältst die 1:1 Regel ein

    • untere Hälfte: 🚫 Du musst sofort deine Höhe verringern oder den Abstand erhöhen

So einfach ist das, aber ich sehe auch schon, dass Du vielleicht ein kleines Fragezeichen im Kopf hast. Vor allem beim 2. Punkt, denke ich. Wo bekommst Du den Neigungswinkel der Kamera her? Deshalb hier noch ein paar ergänzende Worte dazu.

Bei den meisten DJI Drohnen siehst Du auf dem Monitor auf der rechten Seite eine kleine Skala.

Diese ist meist recht transparent solange Du die Kamera nicht nach oben oder unten schwenkst, wird aber intransparent, sobald Du die Kamera schwenkst.

Auf dieser Skala kannst Du den Kameraneigungswinkel sehr gut ablesen. Bei manchen Modellen hast Du sogar Marker für die 45° Position.

Du verstellst den Winkel bei DJI Drohnen meist über ein kleines Drehrädchen an der Fernsteuerung.

Ok, wenn es Dich nicht interessiert warum das so ist, dann solltest Du den nächsten Abschnitt überspringen und hier weiter lesen.

Der mathematische Hintergrund

Wie schon oben erwähnt sind einfache trigonometrische Beziehungen der Grund dafür, dass man das so einfach machen kann.

Vielleicht weisst Du noch aus dem Matheunterricht in der Schule, dass die Summe aller Winkel in einem Dreieck 180° sein muss. In unserem Beispiel haben wir nun auch noch die Besonderheit, dass es sich um ein rechtwinkliges, gleichschenkliges Dreieck handelt:

Seite a ist auch gleichzeitig die Höhe der Drohne. Die abgebildete Kamera ist in einem 45° Winkel nach unten geschwenkt. Seite c ist der horizontale Abstand der Drohne zu der unbeteiligten Person. Der rechte Winkel ist zwischen den Seiten a und c.

Wie funktioniert das?

Stelle Dir folgendes Szenario vor: Du fliegst mit deiner Drohne durch die Gegend und plötzlich fällt ein Motor aus. Bei den meisten Drohnen bedeutet das, dass die Drohne auf jeden Fall abstürzen wird.

In diesem rechtwinklingen Dreieck gilt a = c, also Höhe der Drohne über Grund ist gleich Abstand zur unbeteiligten Person.

Gleichung-Copteruni-1-1-Regel.

Natürlich kannst Du das nur im flachen Gelände machen. Falls das ganze in absteigenden oder ansteigenden Gelände passiert, ist es nicht mehr so genau.

Falls Du nicht nur im Wald schläfst und einen buschigen Schwanz hast, sondern auch ein Fuchs bist, ist Dir vielleicht noch ein weiterer nützlicher Anwendungsfall aufgefallen…

Wie Du mit der Drohne Distanzen misst

Natürlich kannst Du diese Erkenntnis auch dazu nutzen, mit deiner Drohne Distanzen zu messen. Dazu gibt es 2 Möglichkeiten:

  1. Möglichkeit

    • Bringe das Objekt, zu dem Du die Distanz messen willst in deinen Bildausschnitt

    • Schwenke deine Kamera 45° nach unten

    • Steige oder sinke solange, bis sich das Objekt in der Mitte des Bildes befindet

    • Lese deine aktuelle Höhe ab. Das ist auch die Entfernung zum Objekt ✅

  2. Möglichkeit

    • Bringe das Objekt zu dem Du die Distanz messen willst in die Bildmitte

    • Lese deinen aktuellen Kamerawinkel und deine Höhe ab

    • Benutze unseren Rechner oder die PocketCard, um die aktuelle Distanz zu ermitteln.

Hinweis:Trage mindestens zwei der drei Werte ein. Der fehlende Wert wird automatisch berechnet.

1 zu 1 Regel in einer Tabelle

1-1-Regel-Copteruni

Die PocketCard benutzt Du übrigens folgendermaßen:

  • Lese den Neigungswinkel der Kamera ab und steige mit diesem Wert in die 1. Spalte ein

  • Dann schaust Du oben in der ersten Zeile und gehst so weit nach rechts, bis Du deine aktuelle Höhe gefunden hast.

  • Der Schnittpunkt des Neigungswinkel-Zeile und der Höhen-Spalte ist deine Entfernung zum Objekt.

Damit es klarer wird, noch ein kleines Beispiel:

Ich fliege mit meiner Drohne aktuell in 70m Höhe und meine Kamera ist um 20° geneigt. Wenn Das Objekt nun in der Bildmitte ist, habe ich eine Entfernung von ca. 192m zum Objekt.

Super, oder?

Fazit

Mit diesen einfachen Tips, weisst Du nun wie Du ganz einfach die 1:1 Regel einhalten kannst ohne die große Unsicherheit des Schätzens zu haben. Gleichzeitig habe ich Dir auch noch gezeigt, wie Du mit deiner Drohne Distanzen relativ genau abmessen kannst.

Die PocketCard hilft Dir dabei, aus fast jeder Position die Entfernung zu etwas zu messen.

Ich empfehle Dir, das Ganze mal direkt für Dich draußen beim echten Fliegen auszuprobieren. Fliege dabei bewusst mal die unterschiedlichen Abstände wie 30m, 10m, oder auch 5m zu Dir an. Und Du wirst feststellen, dass Du unter Einhaltung der Regeln wirklich dicht an unbeteiligte Personen heranfliegen darfst.

Ich hoffe ich konnte Dir mit diesem Newsletter einen wirklichen Mehrwert bieten.

Über dein Feedback würde ich mich sehr freuen und natürlich kannst Du dieses Thema bei uns im Copteruni Campus ausgiebig diskutieren.

The 1:1 rule

Well, it's really easy. The 1:1 rule states that the drone's flight altitude must not be greater than the distance from uninvolved persons. This means that if you fly 50 m high, you must also maintain a minimum distance of 50 m from the uninvolved persons. If you only fly 20 m high, a distance of... 20 m, that's right. 😉

Well, you see, it's really easy.

But also equally important, because the 1:1 rule is used for the so-called soil risk, In other words, to minimize the risk that your drone poses to objects on the ground.

How does that work?

Imagine the following scenario: You're flying through the area with your drone and suddenly a motor fails. With most drones, this means that the drone will definitely crash.

But now the drone will not fall vertically like a rock to the ground in place, but because it still has a certain horizontal speed, it will travel a certain distance until it hits the ground. This route depends primarily on the altitude, the mass of the drone and, of course, your speed.

Here is an example of a drone that flies at an altitude of 50 m at a speed of 5 m/s and weighs 900 g (like most Mavics):

Simulation Flugbahn einer Drohne

Simulation by Walter Fendt.

Here you can see that the distance traveled after the engine failure is still 16m and it takes about 3s until the drone hits.

By complying with the 1:1 rule, we therefore still have enough safety buffers left over here so as not to endanger uninvolved persons. More specifically, it is 50m - 16m = 34m.

If you repeat the experiment at the maximum speed of 21 m/s, the buffer becomes significantly smaller or is no longer available at all. The distance traveled after engine failure is then 67m! 😳

For example, this is one reason why you have to activate slow flight mode (max. 3 m/s) in the A2 category as soon as you fly closer than 30 m to uninvolved people.

Well, now you know what the 1:1 rule is and why they introduced it.

But now back to the actual topic.

How can I put the 1:1 rule into practice?

We use very simple trigonometric relationships. Put more simply: simple principles of triangles 😉 and a feature that most drones with cameras have out of the box.

And because I don't want to burden you with mathematical formulas now, I'll explain to you directly how it works in practice:

If you want to check whether you are following the 1:1 rule, you can do the following:

  • Align your camera so that you have the innocent person or other critical infrastructure in the picture.

  • Swivel your camera down to a 45° angle.

  • Check whether the person is in the top or bottom half of the screen

    • Top half: ✅ All good, you comply with the 1:1 rule

    • lower half: 🚫 You must immediately reduce your height or increase the distance

It's as simple as that, but I can already see that you might have a small question mark in your head. Especially on the 2nd point, I think. Where do you get the camera's angle of inclination? So here are a few additional words about this.

With most DJI drones, you'll see a small scale on the screen on the right side.

This is usually quite transparent as long as you don't pan the camera up or down, but becomes opaque as soon as you pan the camera.

On this scale, you can read the camera angle very well. With some models, you even have markers for the 45° position.

You usually adjust the angle of DJI drones using a small wheel on the remote control.

Okay, if you're not interested in why this is the case, then you should skip the next section and Read more here.

The math background

As mentioned above, simple trigonometric relationships are the reason why you can do this so easily.

Perhaps you still know from math lessons at school that the sum of all angles in a triangle must be 180°. In our example, we now also have the special feature that it is a right, isosceles triangle:

Side a is also the height of the drone. The camera shown is tilted downwards at a 45° angle. Side c is the horizontal distance between the drone and the uninvolved person. The right angle is between sides a and c.

How does that work?

Imagine the following scenario: You're flying through the area with your drone and suddenly a motor fails. With most drones, this means that the drone will definitely crash.

In this right triangle, a = c applies, i.e. The height of the drone above ground is equal to the distance from the uninvolved person.

Rechtwinkliges Dreieck mit den Seiten a, b und c, einem 45-Grad-Winkel und einer Kamera in der linken oberen Ecke, rechts geht eine Person.

Equation—Copteruni-1-1 rule.

Of course, you can only do this on flat terrain. If the whole thing happens in descending or ascending terrain, it is no longer as accurate.

If you not only sleep in the forest and have a bushy tail, but are also a fox, you may have noticed another useful use case...

How to measure distances with a drone

Of course, you can also use this insight to measure distances with your drone. There are 2 ways to do this:

  1. possibility

    • Bring the object to which you want to measure the distance into your image section

    • Swivel your camera 45° down

    • Rise or fall until the object is in the center of the image

    • Read your current altitude. That is also the distance to the object ✅

  2. possibility

    • Bring the object to which you want to measure the distance in the center of the image

    • Read your current camera angle and height

    • Use our calculator or PocketCard to determine the current distance.

🟢 1:1 rule met

🔴 1:1 rule not fulfilled!
You have to adjust your flight altitude by xxx reduce.

Note:Enter at least two of the three values. The missing value is calculated automatically.

1 zu 1 Regel in einer Tabelle

1-1 rule-Copteruni

By the way, you use the PocketCard as follows:

  • Read the camera's angle of inclination and enter the 1st column with this value

  • Then look at the top of the first line and go as far to the right until you find your current height.

  • The intersection of the Tilt Angle line and the Height column is your distance from the object.

To make it more clear, here's a small example:

I am currently flying at an altitude of 70 m with my drone and my camera is tilted at 20°. If the object is now in the center of the image, I have a distance of approx. 192m from the object.

Great, isn't it?

conclusion

With these simple tips, you now know how to easily comply with the 1:1 rule without the great uncertainty of guessing. At the same time, I also showed you how you can measure distances relatively precisely with your drone.

The PocketCard helps you measure the distance to something from almost any position.

I recommend that you try the whole thing out for yourself while flying for real. Deliberately fly at different distances such as 30m, 10m, or even 5m from yourself. And you'll find that you can fly really close to innocent people in compliance with the rules.

I hope I was able to offer you real added value with this newsletter.

I would be very happy to receive your feedback and of course you can discuss this topic extensively with us on the Copteruni Campus.

Attention drone pilots! These guidelines are helpful tips based on experience, but they are not legally binding. They do not replace official drone laws, nor do they replace the existing geozones, where much is already regulated. They only serve to make it easier for us to fly and to help us fly more safely.

The solution - a distinction is made according to the infrastructure

First of all, EASA has specified that people who are not protected by vehicle covers must be seen as uninvolved third parties and that the known distances and rules therefore apply.

As a result, people within a closed vehicle cannot be seen as uninvolved third parties 👍🏻.

However, in order not to have to look at which types of vehicles are now on the road every time, EASA recommends differentiating according to the infrastructure. Namely to motorways (translated, original: highways) and other roads.

Furthermore, a distinction is made within these two sectors according to the operating category, i.e. between A 1, A 2 and A 3.

And now to the specific recommendations for motorways and other roads.

Motorways - you should keep that in mind

Here is a nice table with which you can see what applies in the respective operating category.

Motorways - you should keep that in mind

terms

A1

A2

A3

Overflight allowed?

🟢🟢🔴

Hovering (floating) allowed?

🔴🔴

Longer flights over or along the infrastructure?

🔴🔴

20m minimum height

🟢🟢

Unrestricted view of the drone at all times

🟢🟢

Drivers are not distracted by banners, flashy lights, etc.

🟢🟢

No vehicles available during the overflight

🔴🟢

🟢 = yes, or must be considered 🔴 = no, or must be ignored

note: In A3, you can't do that at all.

That applies to other roads

Here, too, we have put together a nice table for you.

That applies to other roads

terms

A1

A2

A3

Overflight allowed?

🟢🟢🟢

Hovering (floating) allowed?

🔴🔴🔴

Longer flights over or along the infrastructure?

🔴🔴🔴

20m minimum height

🟢🟢🟢

Unrestricted view of the drone at all times

🟢🟢🟢

Drivers are not distracted by banners, flashy lights, etc.

🟢🟢🟢

No vehicles available during the overflight

🟢🟢🟢

🟢 = yes, or must be considered 🔴 = no, or must be ignored

You can immediately see that there is much more to other roads, especially in the A3 category. However, there must never be uninvolved persons in vehicles nearby during the crossing.

Conclusion and an important note ⚠️

In principle, of course, you must never disturb or endanger traffic with your drone. If you operate nearby, the 1:1 rule also applies. Always watch out for innocent people in vehicles.

With these recommendations, EASA has created a nice guideline which, on the one hand, reduces the risk of a corresponding mission and at the same time also provides clear recommendations for action.

It is now up to countries to consider it within the framework of geozones.

⚠️ We have already introduced corresponding geozones in Germany. In [§21h LuftVO] It's called so nicely:

(3) Operation in the following geographical areas is permitted under the following conditions...

5. over and within a lateral distance of 100 meters from federal highways, federal waterways and railways,

a) if, in the event of an overflight of federal trunk roads or railway facilities, the operation takes place in the “special” category and the particular risks of overflying federal trunk roads or railway facilities have been sufficiently taken into account within the risk assessment in accordance with Article 11 of Implementing Regulation (EU) 2019/947,

b) if the competent authority or the operator of the facilities has expressly agreed to operate the unmanned aerial vehicle,

c) when the height of the aircraft above ground is always less than the lateral distance from the infrastructure and the lateral distance from the infrastructure is always greater than 10 meters, or

d) If, in the event of an overflight of federal waterways, the aircraft is operated at least 100 meters above ground or water, only one crossing takes the shortest route and no ships or shipping facilities, in particular locks, weirs, ship lifts and berths, are flown over

In this country, it is already clearly regulated how to Federal highways has to behave. Other roads are not yet so clearly regulated, so we recommend that you follow the good airmanship guidelines described here.

What do you think of these guidelines? Will you stick to them or do you think they are complete nonsense?

Let us know and discuss with us and other drone pilots in our exclusive forum, the Copteruni Campus

Über den Autor: Jan Evers

Jan Evers is an outstanding personal coach in the online course sector and a recognized expert in his field. With a Master of Science in Electrical Engineering, he has extensive technical knowledge. In the last 10 years, Jan has not only designed and programmed drones, but has also successfully used them in major film productions such as “Deutschland von Oben” and various Tatort episodes. As an active airline pilot, he also brings valuable professional aviation expertise. His experience as an instructor for airline pilots at a renowned flight school particularly qualifies him to convey learning content effectively and comprehensibly. Jan Evers combines a passion for drones and aviation, which makes him an excellent coach and mentor.

Any more questions?

Give us a call

Write us an email

Chat öffnen

Use our chat

Blog

A2 drone license extension 2025

It was almost 5 years ago when the new EU drone driving license was introduced back then. And since this is always valid for 5 years, the first driving licenses expire on 01.01.2026. There is now new information from the LBA on renewing or refreshing the drone driving license. Regardless of whether it's an A1/A3 or A2 license, this topic concerns all drone pilots!

Like many other drone pilots, you've probably already asked yourself the following:

  • How do I renew my A2 remote pilot certificate?
  • What do I have to do when my A2 drone license expires?

The Federal Aviation Office (LBA) published an official circular on April 11, 2025, which is exactly about that — and we summarize the most important information for you, clearly and comprehensibly.

Which drone license do I need for the DJI Matrice 4T/4E?

If you want to fly the DJI Matrice 4T or 4E, you've probably already come across the new C2 certification. It provides clear guidelines as to which drone driver's license you need in order to be able to use these drones safely and legally. The answer is simple: Without the A2 drone license, you won't be able to exploit the full potential of these drones.

Revolution in der Kitzrettung Drohnenregeln gelockert

Vielleicht hast Du ja schon mitbekommen, dass vor allem ein Thema seit dem Ende der Übergangsregelungen vermehrt in der Rehkitzrettungs-Community heiß diskutiert wird:

Wie kann ich meine Bestandsdrohne auch in einem Abstand von 150m zu Wohngebieten weiterhin für die Kitzrettung nutzen?

Dank des unermüdlichen Einsatzes einiger weniger, vor allem auch Hans Würger, Jürgen Luttmann, Harald Weiner hat das Bundesministerium für Digitales und Verkehr nun folgende Entscheidung getroffen:

Die EU-Drohnenregeln werden für Anwendungen in der Landwirtschaft teilweise ausgesetzt.

Unter anderem ist folgendes neu:

  • Reduzierung des Mindestabstands zu bebauten Gebieten von 150m auf 10m
  • unter gleichzeitiger Einhaltung der 1:1 Regel

Die 1:1 Regel gibt an wie hoch du bei einem gewissen Abstand zu unbeteiligten Personen fliegen darfst. Bist du beispielsweise 50 m hoch musst du auch einen Mindestabstand von 50 m zu unbeteiligten Personen einhalten. Bist du 25 m hoch musst du einen Mindestabstand von 25 m einhalten. Würdest du in einem Abstand von 25 m auf 30 m aufsteigen wollen, musst du auch gleichzeitig den Abstand erhöhen. Man kann die eins zu eins Regel auch mit den Worten: Höhe gleich Mindestabstand zusammenfassen.

Somit schafft es das BMDV rechtzeitig vor Beginn der Kitzretter-Saison eine Lösung zu präsentieren.

Was hältst Du davon?

Diskutiere es mit uns im Copteruni Campus, dort sind auch Hans, Jürgen und Harald der Jägerschaft Verden vertreten und können mitdiskutieren.

Hier findest du alle Informationen des LBA.

Drohnen und Natur - Ein Leitfaden für Drohnenpiloten

Liebe Drohnenpilotin,

lieber Drohnenpilot,deine Leidenschaft für das Fliegen öffnet dir die Türen zu einer Welt aus einzigartigen Perspektiven und unvergleichlichen Aufnahmen der Natur. Doch mit dieser Freiheit geht auch eine große Verantwortung einher – die Verantwortung, unsere natürlichen Lebensräume zu schützen und zu bewahren. In diesem Blogartikel möchte ich dich dazu ermutigen, deinen Horizont zu erweitern und die Auswirkungen deiner Drohnenflüge auf die Umwelt zu verstehen. Lass uns gemeinsam erkunden, wie du mit deiner Drohne die Schönheit der Natur einfangen kannst, ohne sie zu stören.

Uninvolved persons - even in vehicles

The problem

So far, EASA rules have not stated anything specific to reduce the risk posed by drones to vehicles on the ground. In A1/A3 training, the Federal Aviation Office taught that people in vehicles can also be seen as uninvolved third parties. The effects of this view on practice became apparent quickly and were often discussed controversial in forums, etc.: you could barely fly professionally near roads if you saw it very closely. That is why EASA - Best Practices have now been published by EASA - which are intended to provide pilots with a guide to the To lend a hand on how they will deal with such situations in the future should.